How to make simple handmade bookmark?? Here some tips and tutorial to make your own handmade bookmark. This is one of my art design which i will show it to you on how to do this bookmark.
and believe me, it is much more cheaper to do this then you thought .
Materials: Scissors (if you have paper cutter much more better), colour paper, glue (I'm using UHU brand glue), double tapes, black maker pen and PVA glue
2. Firstly, cut the colour paper into each pieces (as diagram below), to make the windows, you have to draw it first, then you cut it into places.
3. To make the strawberry shape, draw the shape of the strawberry first (oval shape) and cut it using your scissors. Then cut the leaves of the strawberry (the green one), then glue it and put it together into places (as diagram below)
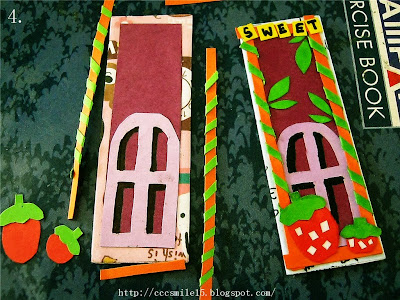
4. After that, when you get all things done, put it all together by using glue and double tape it into places (as diagram below)
5. So, after you put it all into places, your bookmark should be like this, and use your own hand writing to write SWEET using maker pen and glue it at the above of your bookmark (as diagram below).
6. Cut the leaves and put it into places as diagram below.
7. Lastly, Use PVA glue to make the bookmark much more resistant and it will look glossy after you dried it.
Sorry, my tutorial descriptions is not very good, i mean my writing skills... hahaha.. hope you can understand... Hehehe...
If you don't, feel free to ask me and do leave your comments. Thanks ^^
All copyright is reserved.


No comments:
Post a Comment